Hello everyone! Join me in this episode, because today it's her turn, the legendary Baguette , that 250-gram loaf of bread that brightens up our breakfasts, lunches, and any sandwich.
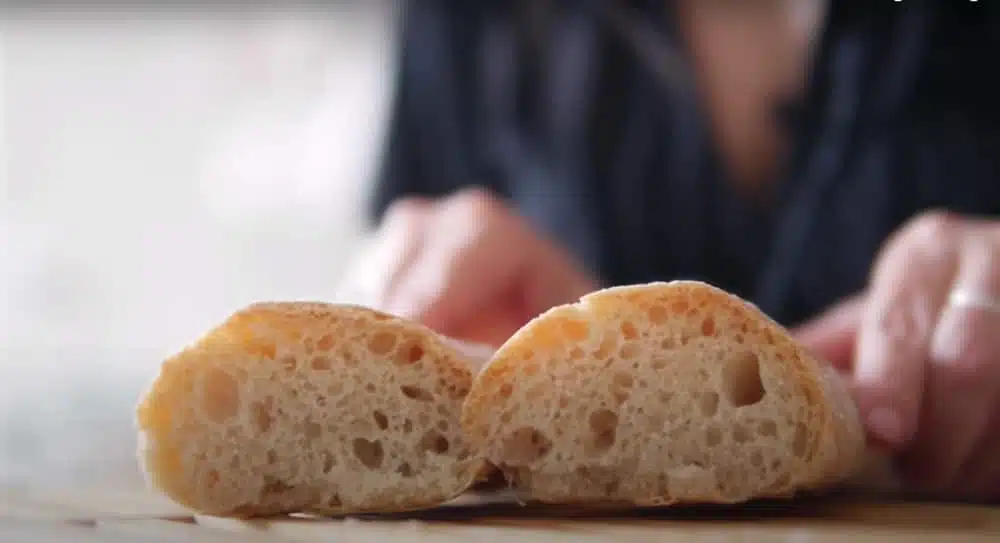
We can define the baguette as the ideal bread for picnics and barbecues, accompanied by a good cheese and red wine. A specialty with a crispy crust and a fluffy crumb.
What's the correct way to make it? How long should it rise? Is making a homemade baguette as difficult as it seems? We'll answer all these questions in a few minutes, but I guarantee it's easier than you expected. I must warn you here that this recipe is a one-way street.
Content table
The History of Baguette Bread
The origin of the baguette dates back to the introduction of Viennese bread to France . It was an elongated loaf leavened with brewer's yeast that, when baked in a steam oven, developed a crispy crust and a fluffy, white crumb. Delicious.
For a time, this bread was made in large loaves and won everyone's hearts. Sales were so high that the bakers couldn't keep up. Following this bakery exploitation, a law was passed protecting bakers' working hours. From then on, work was not allowed before 4:00 a.m.
What happens next? All production schedules are changed, and it's impossible to have the Vienna rolls ready for consumers' breakfast time.
But after the storm, the sun came out —and baguettes came out of the oven. The problem was solved by adopting the thinner baguette preparation, which bakes much faster.
Fun fact, or fait curieux in French: In 1993, the French government declared the baguette "French traditional bread ." In search of an authentic bread, "the traditional baguette." It should be made with pure flour without additives, with minimal kneading, a long fermentation, and no refrigeration at any stage. It can only be made using traditional methods, and fermentation takes 30 hours.
Pre-ferment for homemade bread
Pre-fermentation will greatly change the outcome of our homemade bread; it will develop much more interesting flavors, and thus the bread will last longer. Having a pre-fermentation makes several steps easier, for those who bake bread every day or every other day. If you're making bread only once, a pre-fermentation or poolish will work just as well. We'll just take the time to make it the night before.
What is prefermentation?
Pre-fermentation is a fermentation starter . Some call it sourdough , sponge, or poolish, to give a few examples. The concept is the same for all: we prepare it with a portion of flour and a portion of water, let it ferment beforehand, and then use it with the rest of the dough.
How to make a preferment for bread?
Let's look at the proportions first:
- It will be ¼ teaspoon of dry baker's yeast.
We use more yeast if it's cold and less if it's a summer night.
- 225 gr. of water
- 225 gr. of flour
The quantities used in preparing the pre-ferment aren't the most important factor, and it's fine if you add a little more; in any case, they'll have the same effect. Finally, we cover it with plastic wrap and let it rest overnight at room temperature.
How do you use the pre-ferment? It's easy: mix it with the final ingredients, slightly reducing the proportion of flour, water, and yeast compared to the proportion used in the pre-ferment.
Remember that it's always preferable to use strong flour, which has more gluten, but regular flour can be used as an alternative. Keep in mind that the quality of the ingredients can greatly influence the final result.
⚠️ When you take the baguettes out of the oven, let them cool on a wire rack while you enjoy the aroma of freshly baked bread in your kitchen. Amazing, enjoy!
Yami.
Assistant
Baguette bread recipe step by step
Ingredients
- 400 g. 000 flour
- 275 ml of water
- 8 g. salt
- 10g. fresh yeast (or 4 g. dry yeast)
Homemade baguette bread in 10 steps
- Dissolve fresh yeast in water at room temperature.
- In a bowl, place the flour with a teaspoon of salt. In the center, add the yeast and water mixture. Mix everything until well combined.
- Transfer the dough to a smooth surface and begin kneading for 10-15 minutes.
- Once the raisin is ready and elastic, place it back in a container and let it rest for 40 minutes or until it doubles in volume.
- After the time has passed, fold the dough over itself and let it rest for another 40 minutes.
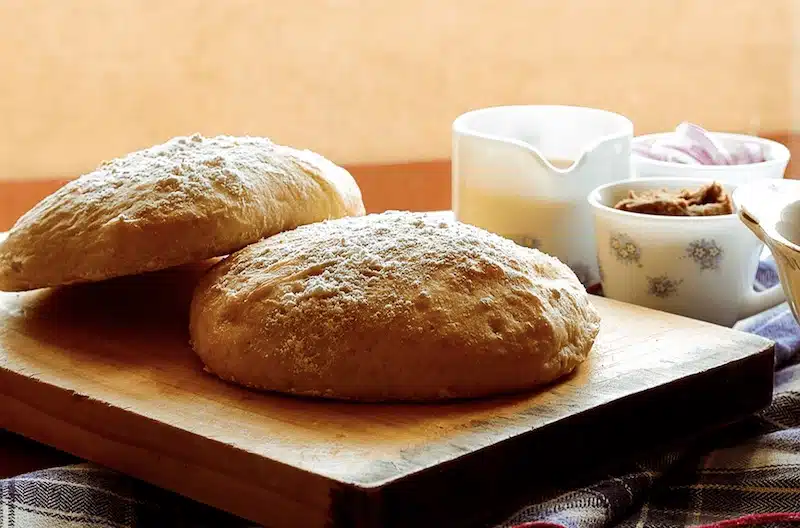
- Place a little flour on a surface, pour the dough onto it, and divide it into 3 equal pieces. Then form each into a ball and let it rest for 15 minutes.
- After the time has passed, form rectangles with each of the buns and then shape them into a baguette. Always handle the dough very carefully.
- Once the three strips are formed, sprinkle a generous amount of flour on a cloth and arrange the baguettes on it. Let them rise until they double in size (40-60 minutes).
- Finally, place them on a baking dish, make a few small cuts on top, and place them in an oven preheated to 150-160º.
- Under the pan, place another pan filled with hot water to generate steam during the initial cooking process. If the pans begin to brown, lower the temperature and continue cooking.
Baguette Bread Recipe Video
You can find this same recipe in a very well-explained video by Paulina. Here it is for you to check out:


I love your recipes, super easy and most importantly how well you explain, congratulations, I follow you from Australia, I'm Uruguayan?